Getting started
urls.bio is open to everyone. Sign up at urls.bio/signup or in the iPhone app, claim the handle you want, and your page is live at urls.bio/yourname.
See the feature page: starter pages.
This page takes you from signing up to a live page. It is a few minutes of work, and everything in it can be changed afterwards.
Signing up
Go to urls.bio/signup. Signup is two steps, one screen at a time.
- Claim your handle. This is your page address,
urls.bio/yourname. Lowercase letters, numbers, and underscores, three characters or more. urls.bio checks whether it is free while you type, so you find out before you commit. If it is gone you get "@yourname is taken. Try another." - Make it yours. Set your email and a password (eight characters or more), plus the terms checkbox, or continue with Google. That is the account created.
There is no card at signup, no waitlist, and no invite. The free plan is free forever.
If you reserved a handle while urls.bio was invite only, it is still held for the email you reserved it with: sign up with that email and the handle is yours.
On an iPhone. The app on the App Store signs you up the same way, with Apple, Google, or an email and password, and lands you in the same dashboard. One account works in both places, and the Download on the App Store badge in the dashboard sidebar takes you to it.
The app adds four things the phone can do that a browser cannot. Share to urls.bio from any app: tap Share on a video, an article, or a photo, pick urls.bio, and it lands on your page as a block with its title and preview filled in; photos become Image blocks. Two widgets, Today (views and clicks, with a week of bars) and My QR (a code that opens your page, tap it for a full-screen one), on the Home Screen and the Lock Screen; they refresh whenever you open the app. Push notifications for a new subscriber, a new form reply, the first click on a block you published today, and your Monday recap; the switches under Settings, Notifications govern the ones that have a switch. Siri and Shortcuts: "Show my urls.bio QR code", "Add a link to my urls.bio page", and "How many views on urls.bio today".
Setting up the page
Onboarding is five steps, one screen at a time, and it ends with your page public.
- Claim your handle. Your address,
urls.bio/yourname. urls.bio checks whether it is free while you type, and if the one you tried is gone it offers three that are. If you already claimed a handle at signup this step is done for you and you start on the next one. - Bring your page across, if you already have one somewhere. Paste your Linktree address and urls.bio reads it, shows you what each thing would become here, and builds it once you say so. Skipping is one tap and most people do. See bringing a page across.
- Pick your look. Six presets: Soft Depth, Frosted Glass, Editorial, Poster, Ledger, and Print. Each card is a small drawing of your own page in that look, so you are choosing the finished thing rather than a swatch. Nothing here is final. The Design panel holds all six afterwards, plus colors, fonts, and backgrounds.
- Build your page. This step is the Studio itself, the same editor you use from then on, with a step bar across the top. An empty page offers a handful of blocks you can add in one tap, and Browse templates fills it from a template instead. Your name, photo, bio, and social icons all live in the profile block at the top of the page: tap it and the panel edits it. Two markers in the step bar, socials and first block, tick as you go.
- Go live. Set a password, eight characters or more, and press Go live. Pressing it is where you agree to the terms, and
urls.bio/yournameis public from that moment. You land in the dashboard.
The first time the dashboard opens after that, a strip across the top reads "urls.bio/yourname is live" and carries Copy, Share, and QR. It is there to get the link out of the browser and into your bios while you are thinking about it. The X dismisses it and it does not come back.
Handles are first come, first served. You can change yours later in Settings, but the old address stops working the moment you do, so it is worth getting right now. See sharing.
Bringing a page across
If you already have a Linktree, paste its address at step two. We read the page the same way any visitor does, with no login and no access to your account there, and then show you a receipt before anything is written.
The receipt lists every single thing on the page, in three states:
- Matched. We have the same thing. Your links, headings, sections, pictures and anything we can play in place all land as themselves. A link that was a big card on their side is a Card here, with its picture.
- Changed. It became something close, and the row says what and why. A block that shows your latest post becomes a link to your profile, because we do not pull posts automatically. Anything that took payments becomes a link to where it pointed, because we do not take payments yet.
- Needs you. It came across but wants a decision, usually because of a plan limit.
Nothing is ever dropped without appearing on that list. A block type we have never seen becomes a link to the same address, and says so.
Leave out removes a row before it is built. Leaving out a section leaves out what was inside it, since a section's contents with no section is a pile of orphans.
If your page uses something Pro
Some of what comes across only renders on Pro: more than one tab, a menu, a contact form, a file download, a voice intro, a gallery past five images, an image background.
None of it is dropped. It is imported, it is saved, and the last step of onboarding tells you exactly what is waiting and what a free page does with it instead. More than one tab shows as a single list; a Pro block stays in your editor and off your page; a long gallery shows its first five.
Nothing is lost by going live on Free and upgrading later. See plans.
Two things worth knowing:
- We bring your look, not their design. Your page colour, text colour, button shape and button style come across when we can read them. Their gradients, blurs, shadows and header logo do not: those are their design rather than their colours, and everything about the look is yours to change in design.
- Your handle is not taken from them. Whatever handle you claimed at step one is the one you keep. We never claim the handle from the page you imported, because it may belong to somebody who still wants it.
Imports only work on a page with nothing on it yet, so it cannot interleave with work you have already done. Beacons and bio.link are next.
Templates
Browse templates in the step bar, and "or start from a template" on an empty page, open the same six pages. Each is a whole page of blocks for a kind of work, drawn in the look you picked, so the card you tap is what you get.
- Musician. A heading for the release, a link to play it, an events block with two dates in it, a link for the video, and an email capture.
- Podcaster. The latest episode heading, Spotify and Apple Podcasts links, three FAQs, and an email capture.
- Creator. Your latest video, a shop link, a poll, and an email capture.
- Coach. A feature card with a Book a call button, three FAQs, a way to get in touch, and your hours.
- Small brand. A story card, a shop link, a discount code, your address, your hours, and an email capture.
- Restaurant. A menu, your hours, your address, a reservations link, and a card for what is on this week.
"Use this page" adds those blocks to the end of your page. Nothing you already made is touched, so a template can sit under blocks you wrote yourself, and you can use more than one.
Everything a template writes is a placeholder: "Your next show", "Your street address, your city", https://example.com/listen. A block still in those words keeps a dashed outline and a "tap to fill" tag in the Studio, and the panel on the right counts how many are left with an Open next button that jumps to one. Edit the block and the outline, the tag, and the count all go. Visitors see none of that, only the words, which is why it is worth working through them, and if some are still unfilled a day later we send one email to say so.
Two blocks are Pro only and are handled for you. A coach gets the contact form on Pro and a Get in touch link otherwise; a restaurant gets the menu block on Pro and a link to the menu otherwise. That is because a free page does not render either block, and a template should not leave you with something invisible.
Templates belong to the build step. Skip them and your page is simply the blocks you added yourself; after you go live you add blocks one at a time from Add in the Studio, and the look is yours to change in the Design panel whenever you want.
Finding your way around
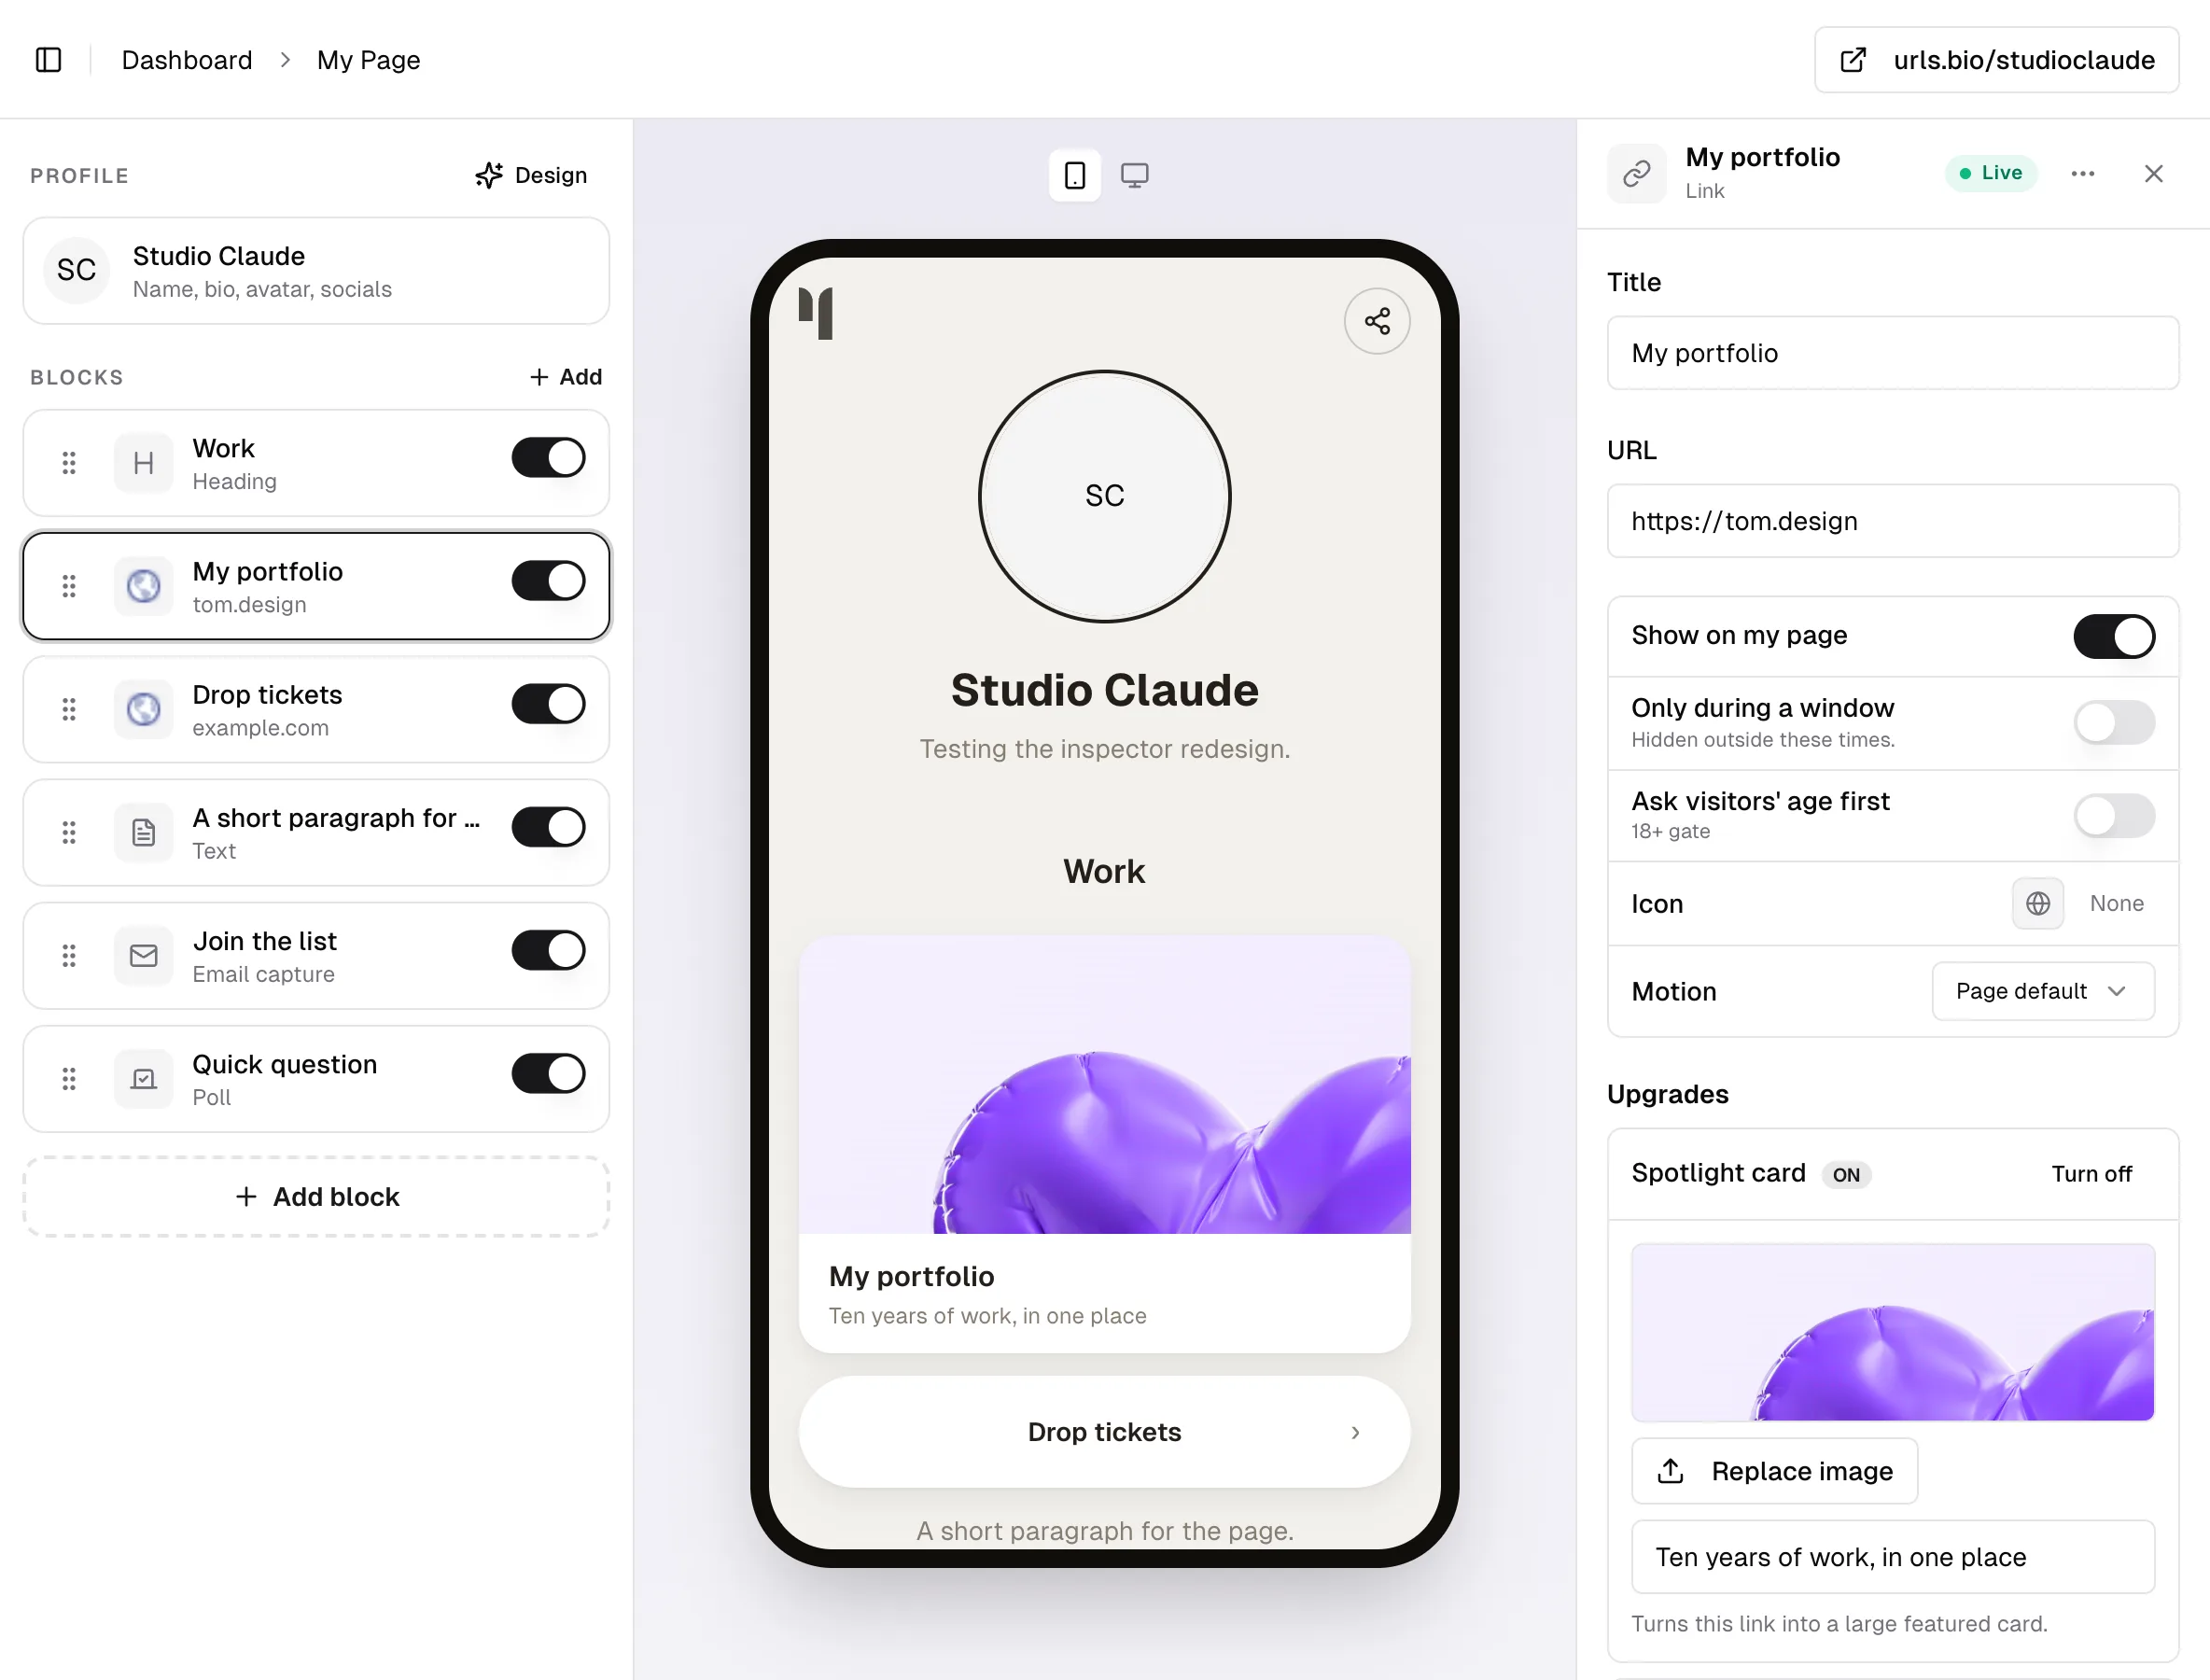
The left sidebar holds the dashboard:
- My Page is the Studio: your blocks, the live page, and the design controls.
- Audience is your list, with the CSV export. See audience.
- Newsletter appears once your sending address is live, and is where you write to that list. See newsletter.
- Analytics is views, clicks, and subscribers over time. See analytics.
- Integrations connects new subscribers to Klaviyo, Mailchimp, beehiiv, Zapier, or a webhook, and holds your Google Analytics and Meta Pixel IDs. See integrations.
- Settings holds your name, handle, bio, page title, passcode, domain, notifications, and the delete-account button. See settings.
Under them is the setup checklist, then your name and plan. The button at the top right of My Page shows your address and opens the live page in a new tab. Cmd+K opens a command palette from anywhere in the dashboard.
The Block Library
Add block, at the end of the list, opens the picker. It puts the four blocks people reach for most one tap away and shelves the rest under Basics, Media, Connect, and Sell.
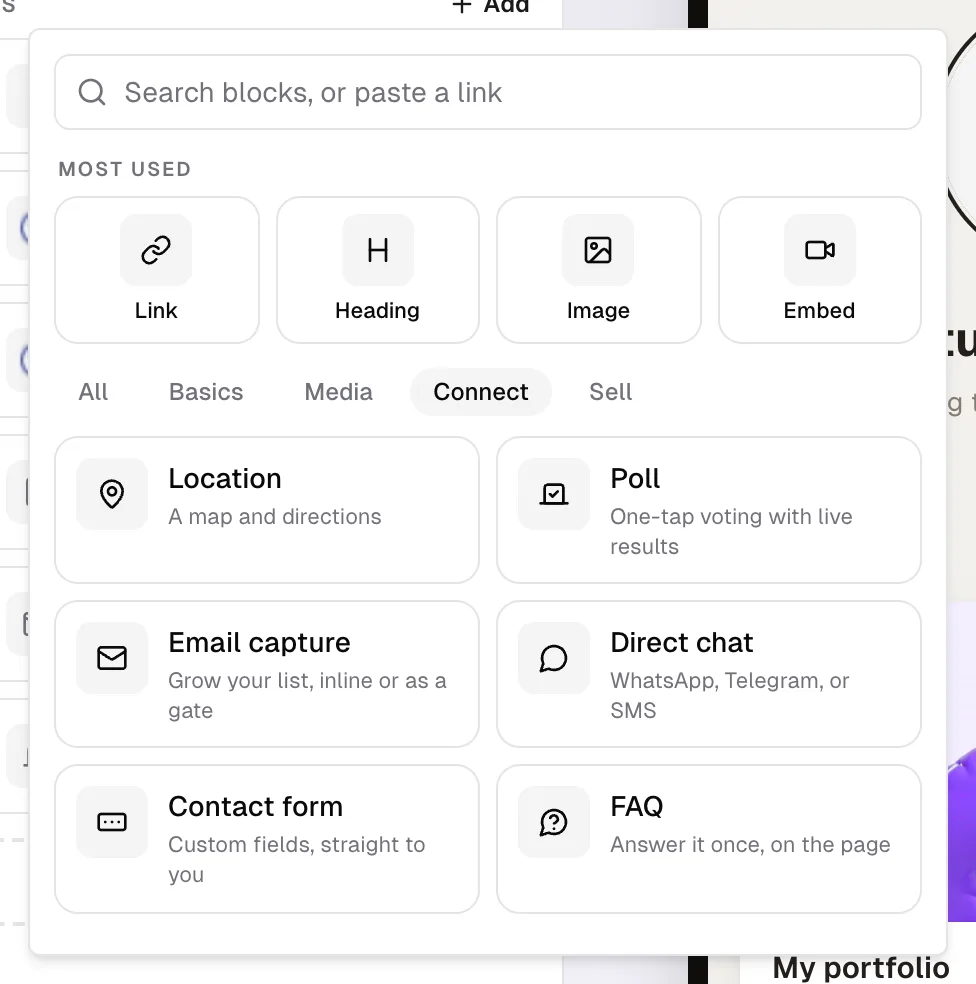
Search it by name or by what you want, or paste a link straight into the search field and it offers the block that fits, already filled in. All twenty-five types are in blocks and links.
The setup checklist
The card reading "Set up your page" tracks three things:
- Add your first link. Ticks as soon as you have one block of any kind, including the ones a template wrote.
- Style it in the Design panel. Ticks when you have moved off the default color scheme, picked a font, or changed the background away from solid.
- Share your page. This one is a button. Clicking it copies
urls.bio/yournameto your clipboard and ticks the row.
The card retires itself once all three are done. The X in its corner dismisses it for good. Both the tick on Share your page and the dismissal are stored in your browser, so they come back if you sign in on a different device.
What to do first
Three things pay off early:
- Add the links you already send people to, in the order you would say them out loud. The per-link click table in Analytics tells you afterwards whether the order was right. See blocks and links.
- Add an email capture block. A follower on a platform is rented; an email address is yours. See email capture.
- Put the link in your bios. One link everywhere you post is the whole point, and it is also what makes analytics worth reading. See sharing.
Emails we send you
Settings has a Notifications card with one switch per kind of email we send you about your own page: the weekly digest, your first subscriber, milestones at 10, 100, and 1,000 subscribers, and the occasional nudge about something your page could be doing. Everything is on until you turn it off, each switch saves as you flip it, and the Stop link at the bottom of any of those emails turns off the same things without your having to sign in. Sign-in links, password resets, receipts, and anything else about your account are not covered by these switches and keep arriving either way. See settings.
Common questions
Can I see a finished page before I start? urls.bio/demo is a live account with links, an embed, and the email gate turned on.
Do I have to pay for anything? No. Free has no time limit and no card. See plans and billing.
Can I change a template afterwards? There is nothing to change. A template writes ordinary blocks in an ordinary look, and both are yours to edit or delete from the moment it finishes.
Where did the setup steps go? Once your account has a name on it, onboarding is finished and /onboarding sends you to the dashboard. Everything in it lives in the Studio and in Settings afterwards.
Is there an app? Yes, urls.bio for iPhone on the App Store. It is the same page and the same Studio, signed in to the same account, so anything you change in one place shows up in the other.
Do I need an invite? No. Invites are retired: urls.bio is open to everyone on the web and in the app.
Nothing arrived after I signed up. See troubleshooting.